Quick answer: To install a mini split heat pump, first work out how much heating and cooling each room needs. Then choose compatible indoor and outdoor units and suitable locations. The installer mounts the units, runs the refrigerant pipes and drain, makes the required electrical and refrigerant connections, and checks that heating, cooling and drainage work correctly. These final start-up checks are called commissioning. Follow the exact model manual and local rules. In the U.S., conventional refrigerant-circuit connections and servicing require the appropriate EPA Section 608 certification; an ordinary mini split is not a plug-in DIY appliance.
How Is a Mini Split Heat Pump Installed?
Installing a ductless mini split has seven main steps: choose the right system, check the site, mount the units, run the pipes and drain, make the required connections, test the system, and explain its use to the owner. Hanging the units is only part of the job. Poor sizing, a leaking drain or an untested refrigerant circuit can cause problems even when the equipment is suitable. The seven steps cover the complete project, including design and handover. The five numbered stages later in this guide describe the main on-site installation work.

| Step | What happens | What to check |
|---|---|---|
| 1. Choose the system | Calculate heating and cooling needs for each room; select indoor and outdoor units approved to work together | Room-by-room loads, winter heating output at the design temperature, compatible model numbers |
| 2. Check the location | Plan the indoor head, outdoor unit, refrigerant pipe route, drain and power supply | Airflow space, strong mounting surfaces, access for service, suitable power |
| 3. Mount the units | Fix the indoor support and the outdoor pad or brackets | Level mounting, safe anchoring, vibration and weather protection |
| 4. Run pipes and drain | Insulate and protect refrigerant pipes; route the drain and control cables | Allowed pipe length, water flow to the drain outlet, sealed wall opening |
| 5. Make connections | Qualified people complete regulated refrigerant, electrical and control work | Required leak, pressure and air-removal (evacuation) checks; safe wiring |
| 6. Test the system | Follow the model’s start-up (commissioning) instructions | Heating and cooling response, temperatures, error codes, drainage and controls |
| 7. Hand over the system | Record installation details and show the owner how to use and maintain it | Manuals, test results, model and serial numbers, access for maintenance |
The outdoor unit may already contain refrigerant when it leaves the factory. That does not mean the pipes installed at your home have been checked. A conventional mini split still needs the leak tests and removal of air and moisture (evacuation) required by its manual. This is not a DIY shortcut. Use only the approved refrigerant pipe sizes and lengths (line set), fittings, insulation, control wiring and any model-specific charge adjustment.
What Must Be Checked Before Installation?
Before you choose installation spots, check what each room needs for heating and cooling. Make sure the indoor and outdoor units work together, the electrical supply is suitable, and air and water have clear paths. Also check the pipe route and local installation rules. A unit’s advertised size or your home’s floor area alone cannot tell you whether it will heat every room adequately.

- Heating and cooling needs: Calculate the load for each room before choosing the equipment. A qualified designer may use ACCA Manual J. In humid climates, the cooling design also needs to account for moisture removal, not just air temperature. Compare each room’s heating and cooling loads with the matched system’s published capacity and part-load operation. Decide whether the mini split will be the main heating system or will work with another heater.
- Heating in very cold weather: If this is the main heater, check its published heating output at your area’s winter design temperature—the outdoor temperature used for sizing. Compare that output with the room’s heat loss, not just the rated capacity.
- Which units work together: Check the approved indoor–outdoor model pairs, how many rooms the outdoor system can serve, the allowed pipe lengths and the height difference between units.
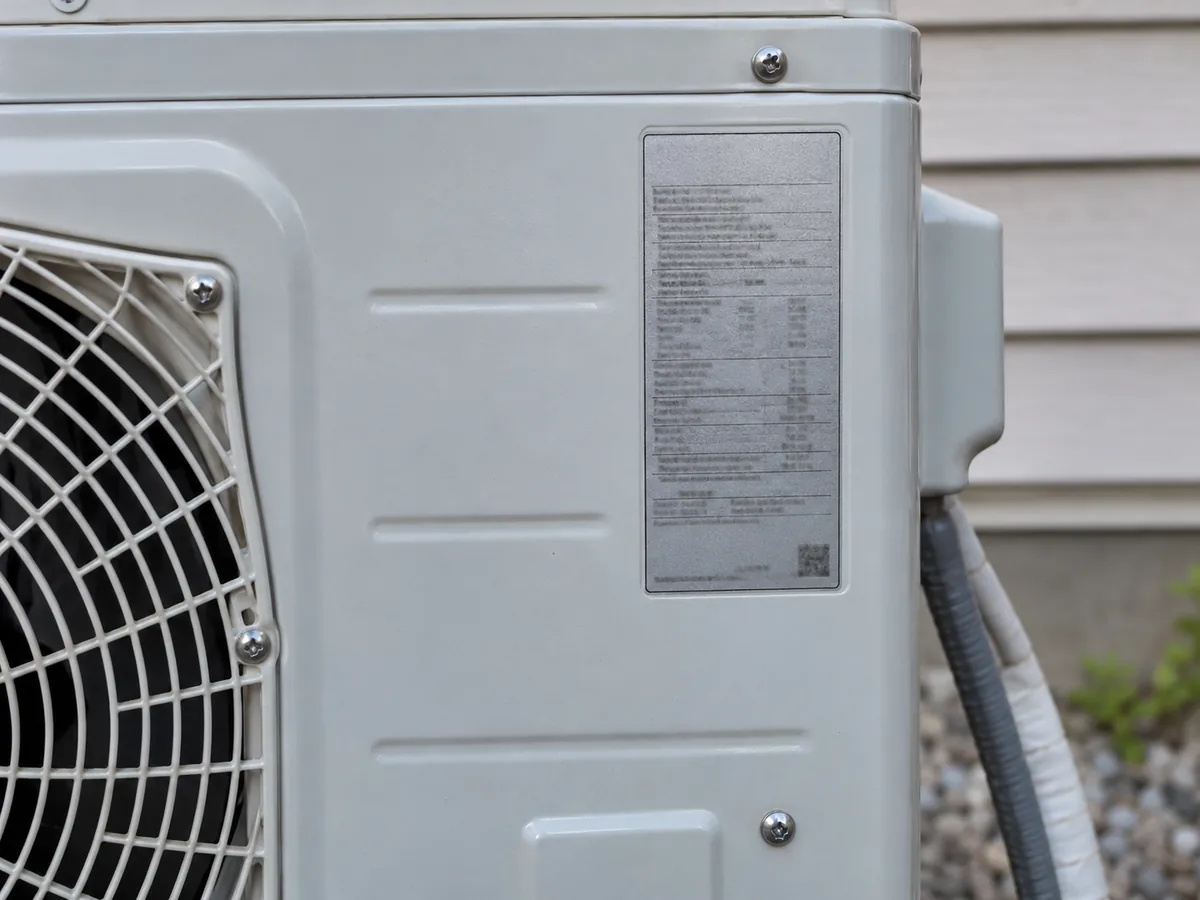
- Power and permits: Check the voltage and electrical current on the equipment label (nameplate). Confirm the required circuit, disconnect, panel capacity, local permits and who is allowed to do the work.
- Walls and water drainage: Make sure the wall or support can carry the units. Plan where the drain water goes, how to seal the wall opening and how to reach filters and service panels.
- Refrigerant and installation eligibility: Confirm the exact factory-approved refrigerant and matching component numbers. Check whether the equipment may legally be installed as a new system under current federal, state and local rules.
In humid weather, a room can reach its temperature setting and still feel damp. Check the room’s moisture load and the selected system’s published moisture-removal performance, if available. Its sensible heat ratio (SHR) indicates how much of the cooling goes toward lowering air temperature rather than removing moisture. Ask how the system behaves when the cooling load is low but humidity stays high. If it cannot manage both temperature and moisture under those conditions, different approved controls or separate dehumidification may be needed; a higher nominal cooling rating is not automatically the answer.
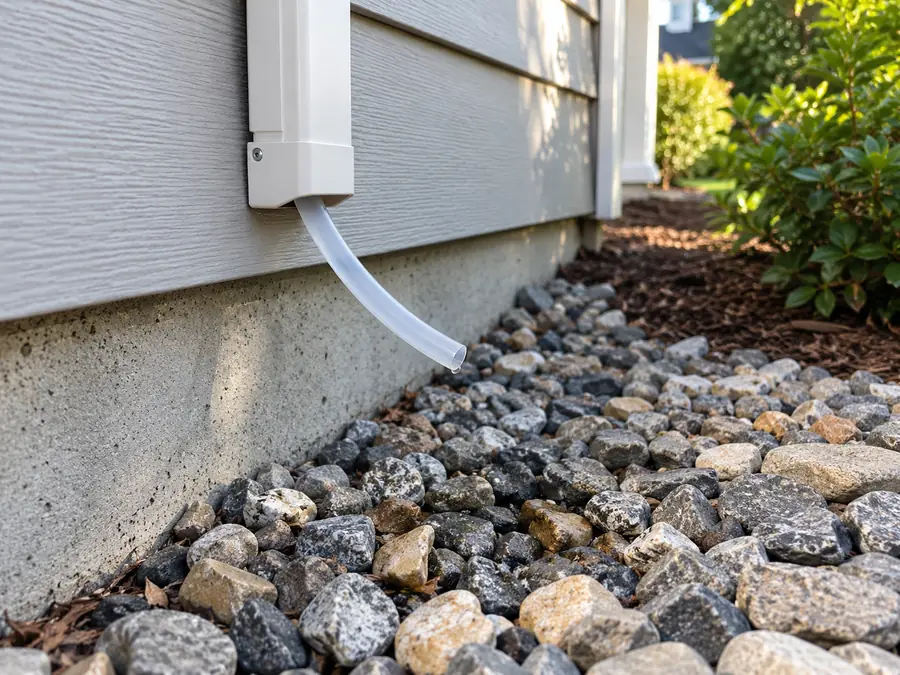
Before any wall opening is drilled, compare the delivered indoor and outdoor model numbers with the approved equipment list. Check that the mounting hardware, line-set components, drain parts, controls and model-specific instructions are available. Confirm the wall route, drain outlet, outdoor support and required permit or inspection arrangements with the installer. If a key part or approved route is missing, resolve it before mounting the units.
U.S. refrigerant rules for 2026: Under the EPA Technology Transitions rules, new residential and light-commercial mini split systems generally face a global warming potential (GWP) limit of 700. GWP measures how strongly a refrigerant can contribute to global warming. Under EPA’s May 2026 reconsideration, a higher-GWP system may still qualify for installation if all specified components were manufactured or imported before January 1, 2025. Rules for repairing an existing system are different. Before using old stock, ask the supplier and installer to check the component dates, the refrigerant approved for the exact models, the legal exception and the applicable safety rules. Not every R-410A system is banned, and not every old component qualifies.
Refrigerant approval and safe installation are two different checks. Some newer mini splits use A2L refrigerants, which have lower flammability rather than no flammability. Check the refrigerant specified for the exact indoor and outdoor units, the product’s safety instructions and the rules that apply at the installation site. Depending on the model and location, these may cover room size, refrigerant charge, pipe routing and protective features. Do not substitute refrigerants or combine unapproved components.
Single-zone or multi-zone installation?
A single-zone mini split uses one outdoor unit with one compatible indoor unit. A multi-zone system connects several approved indoor units to one outdoor unit. Choose between them based on which rooms need heating or cooling at the same time, how independently you want to control them, the available pipe routes and the combinations the manufacturer permits.
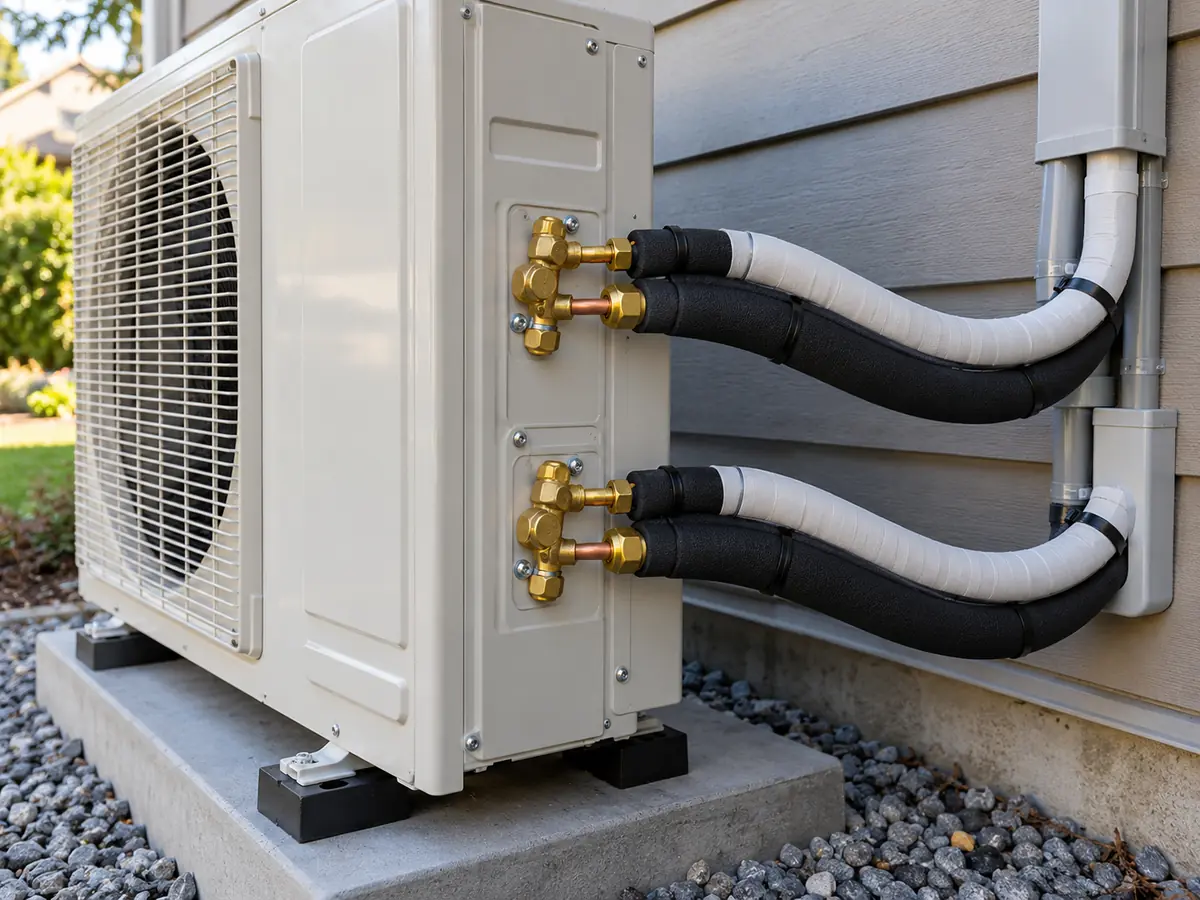
With a multi-zone system, the outdoor unit may not deliver every indoor head’s advertised output at the same time. For rooms that call for heating or cooling together, compare their combined loads with the outdoor unit’s published capacity and the manufacturer’s capacity-allocation limits. When just one small room is calling, check the system’s minimum output: too much output at light loads can cause unwanted cycling or uneven temperatures. Also check whether the selected model allows different indoor units to request heating and cooling at the same time; many standard multi-zone systems cannot provide both modes simultaneously. Separate single-zone systems offer more independent operation but need additional outdoor space and electrical provisions.
What changes in a cold climate?
In a cold climate, start with the amount of heat each room needs on the local winter design day. A mini split’s nominal heating rating comes from specified test conditions; it is not a promise of the same output in colder weather. Compare the exact matched system’s published heating capacity at or near the design outdoor temperature with the building’s heat loss. Then review how defrost periods, outdoor airflow and backup heating are handled in the design. A low minimum operating temperature or a high seasonal efficiency rating alone does not prove that the rooms will stay warm during a cold spell.
Where available, an AHRI certificate helps verify a certified indoor–outdoor combination and its standard-condition ratings; it does not establish the heating output at this home’s winter design temperature. Ask for the matched model numbers and the manufacturer’s expanded heating-performance data at or near the local design temperature. If there is no applicable AHRI listing, check the manufacturer’s approved-combination and performance documentation instead. Have the designer explain any gap between the published conditions and the project’s design conditions.
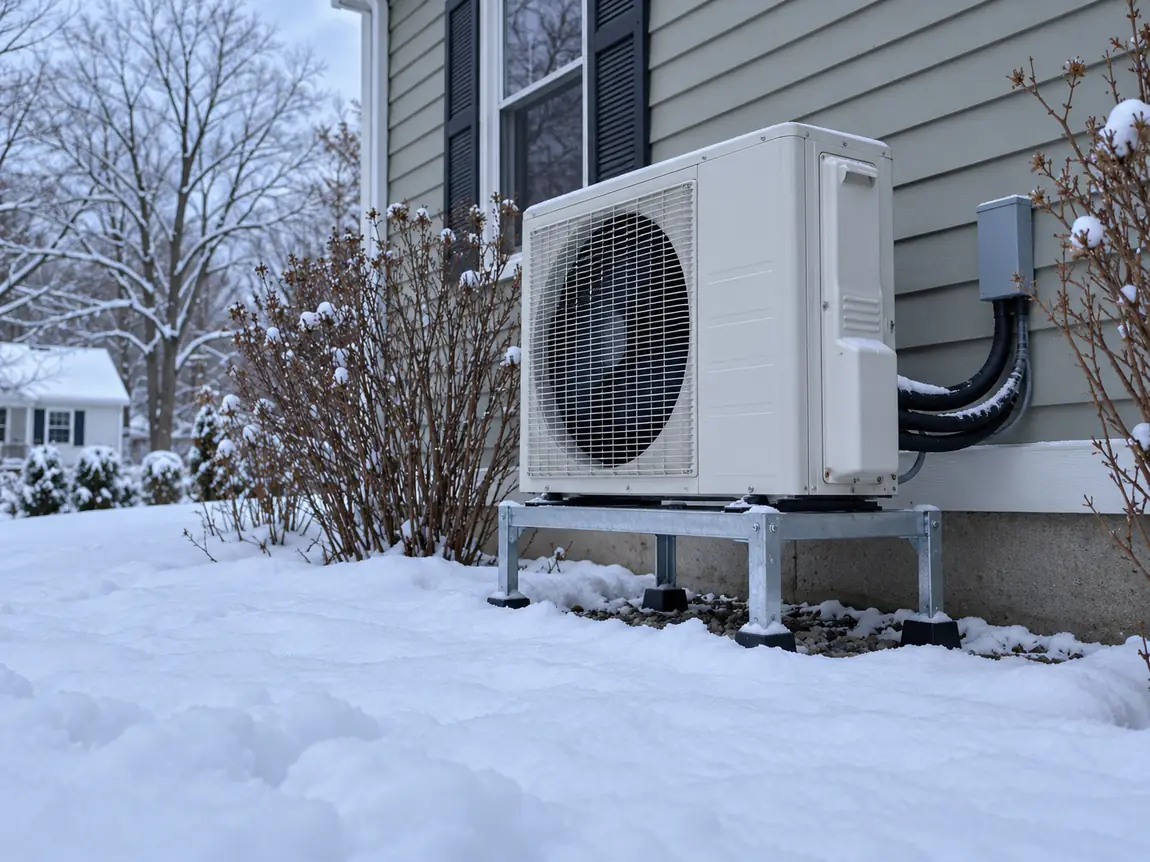
If the model cannot provide enough heat at that temperature, do not simply install the same setup and hope for better weather. Compare a suitable cold-climate model, change the room zoning, keep properly controlled backup heating or reduce heat loss from the building. Mount the outdoor unit high enough to avoid the expected snow. Give defrost water a safe place to drain so it cannot block airflow or freeze on a walkway.
What Information Should You Give the Installer Before Work Starts?
Share a room plan or room measurements first. Add any heating and cooling load calculations, your location and the outdoor temperatures used for winter and summer sizing. Tell the installer how many rooms need separate control. Then show the planned indoor and outdoor locations, electrical supply, wall type, pipe distances and drainage route. For cross-border equipment projects, also state the destination market so the applicable rules can be checked. For a larger project, also tell the installer which rooms need heating or cooling at the same time, the expected hours of use, preferred indoor-unit types, noise limits and control needs.
Before approving the installation layout, ask for a room-by-room load summary, the proposed matched model numbers, the heating-output check at the local winter design temperature when heating is required, and a drawing showing indoor heads, outdoor units, line routes and drains. For a multi-zone system, the plan should also state the approved combinations and how the rooms will be controlled. This lets you check the design against your rooms before any drilling or permanent work begins.
For a U.S. installation, also check the exact model’s voltage and frequency, the approved indoor–outdoor combination, refrigerant, electrical ratings and the product approvals required by the local authority. A specification for another country does not by itself prove that a model can be installed at your site. Check the documentation before finalizing the equipment or installation quote.
Where Should the Indoor and Outdoor Units Go?
Place the indoor unit where its air can reach the room and where you can clean the filter and drain away water. Put the outdoor unit on a strong, stable support with enough open space for airflow and service. Think about noise, roof runoff, snow and water from defrosting. There is no single clearance distance for every model. Use the minimum distances in the selected unit’s installation manual.
Where to install the indoor mini split head?
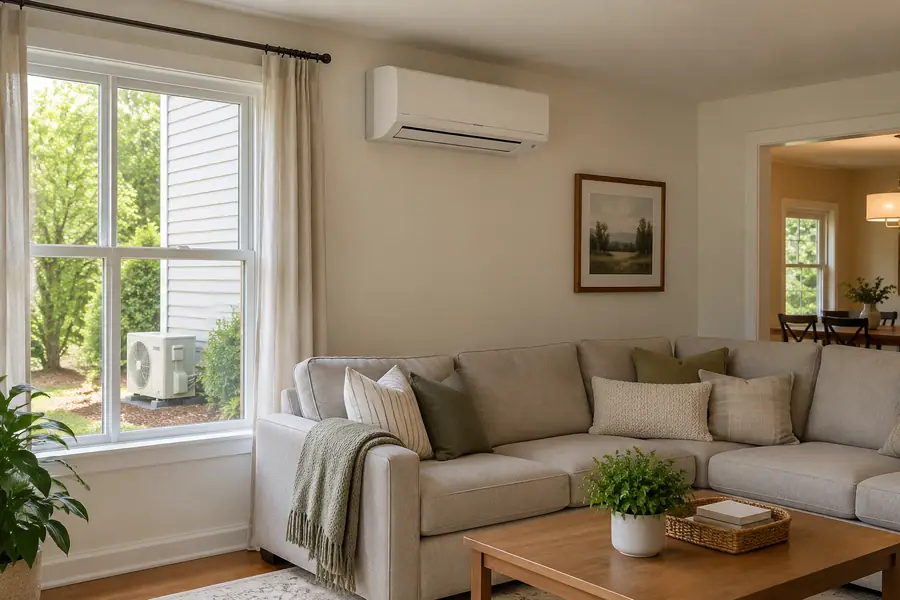
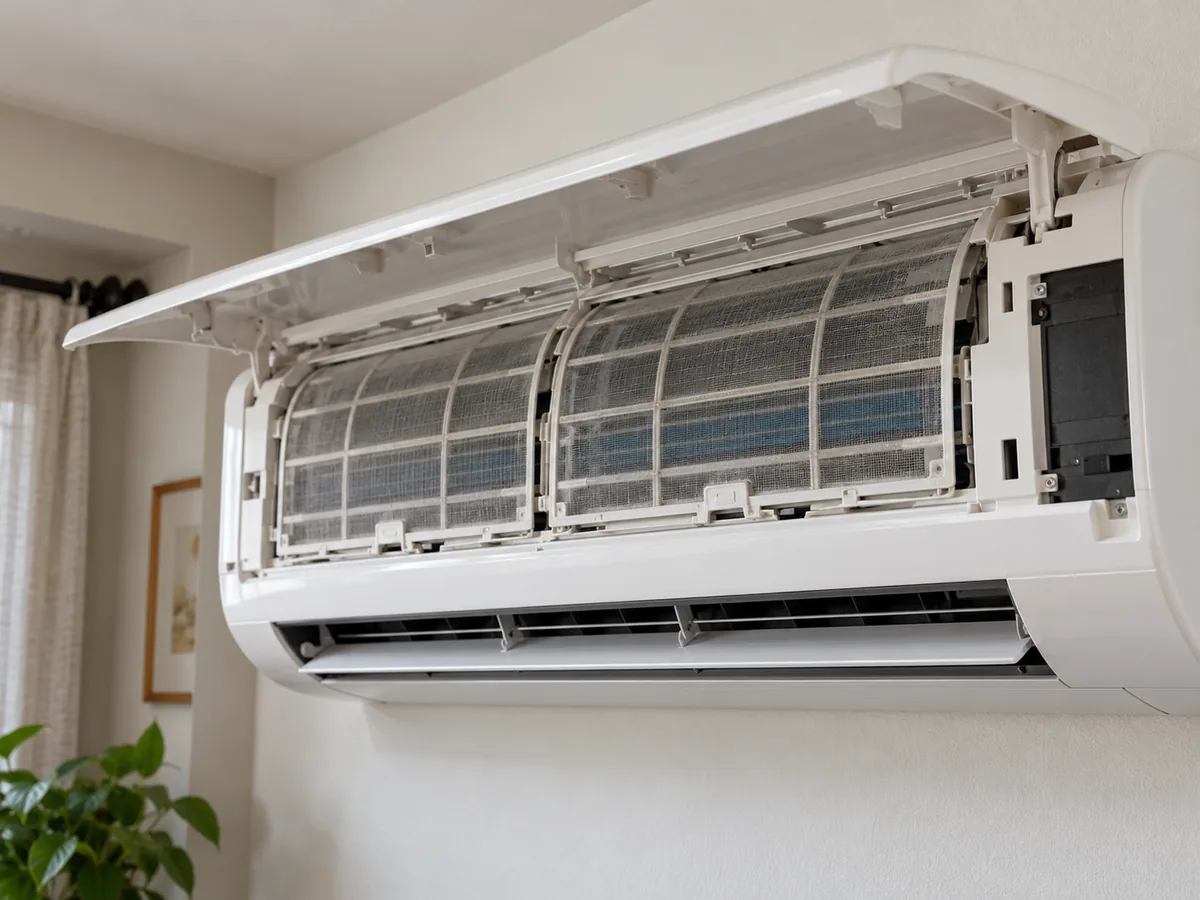
For a wall-mounted indoor unit, choose a strong wall where furniture or other objects will not block the airflow. If the discharged air blows straight back into the unit’s return opening (air short-circuiting), the rest of the room may heat or cool unevenly. Avoid blowing directly on people. Leave room to remove filters and open the electrical cover, and plan a drain line that slopes correctly to the outlet.
Bedrooms, rooms with high ceilings and rooms with unusual shapes may need different indoor positions or unit types. If bedroom doors are normally closed, a wall head in the hallway or living room may not move enough warm or cool air into those bedrooms. Check each room’s load and a realistic air path before deciding whether it needs its own indoor unit or another approved distribution arrangement. Above a doorway can look convenient, but it may block filter access, breach the model’s clearance rules or leave part of the room uncomfortable. Before drilling, check wall materials, hidden pipes and cables, and the position approved for that unit.
Some high-wall indoor heads sense air near their return inlet, which can be warmer than the occupied area during heating. A displayed temperature setting is not necessarily a measurement of room temperature. During an appropriate operating check, measure the temperature where people normally sit or sleep. If that temperature and the unit’s control response do not agree, ask the installer to review the sensor location and the remote-sensor or controller options approved for that model before changing the installation.

Where Should You Install the Outdoor Unit?
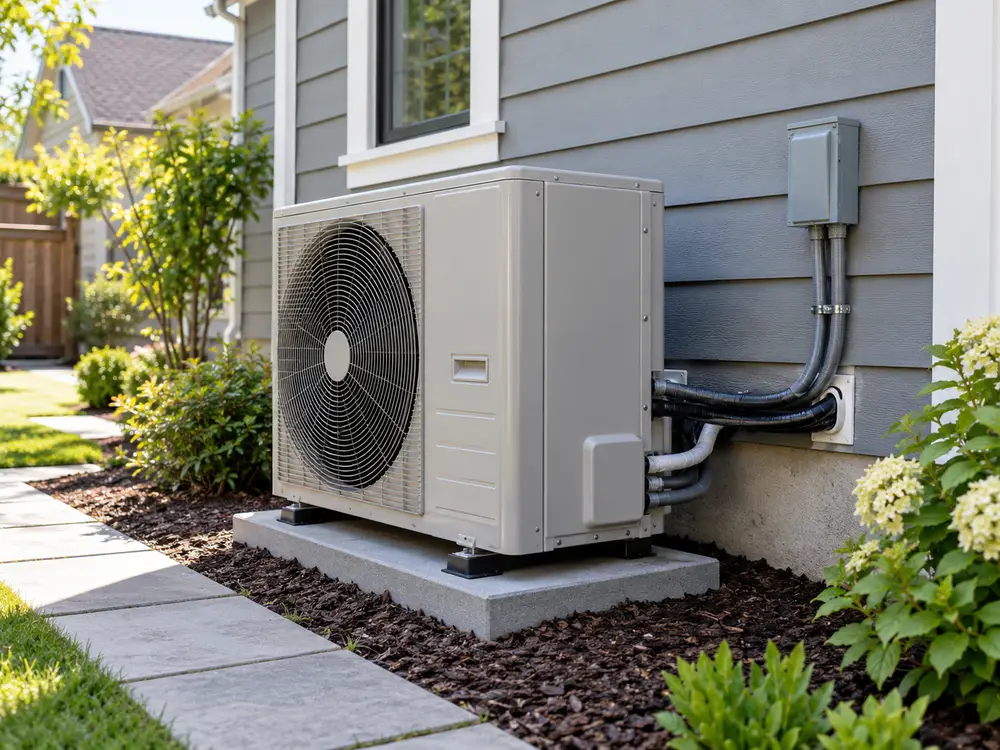
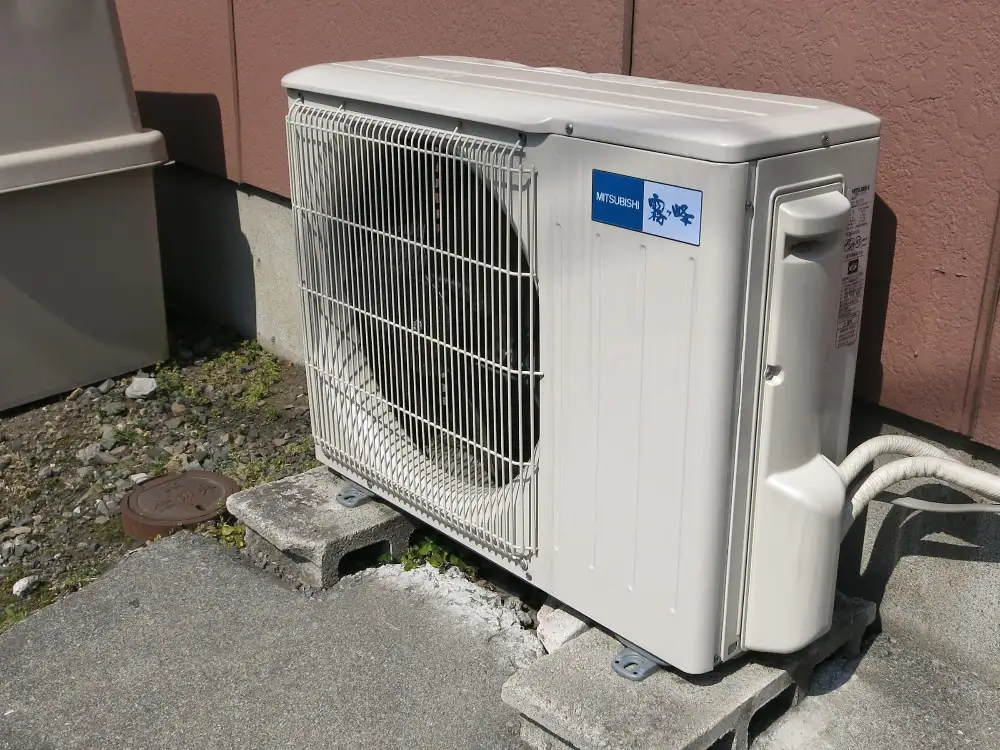
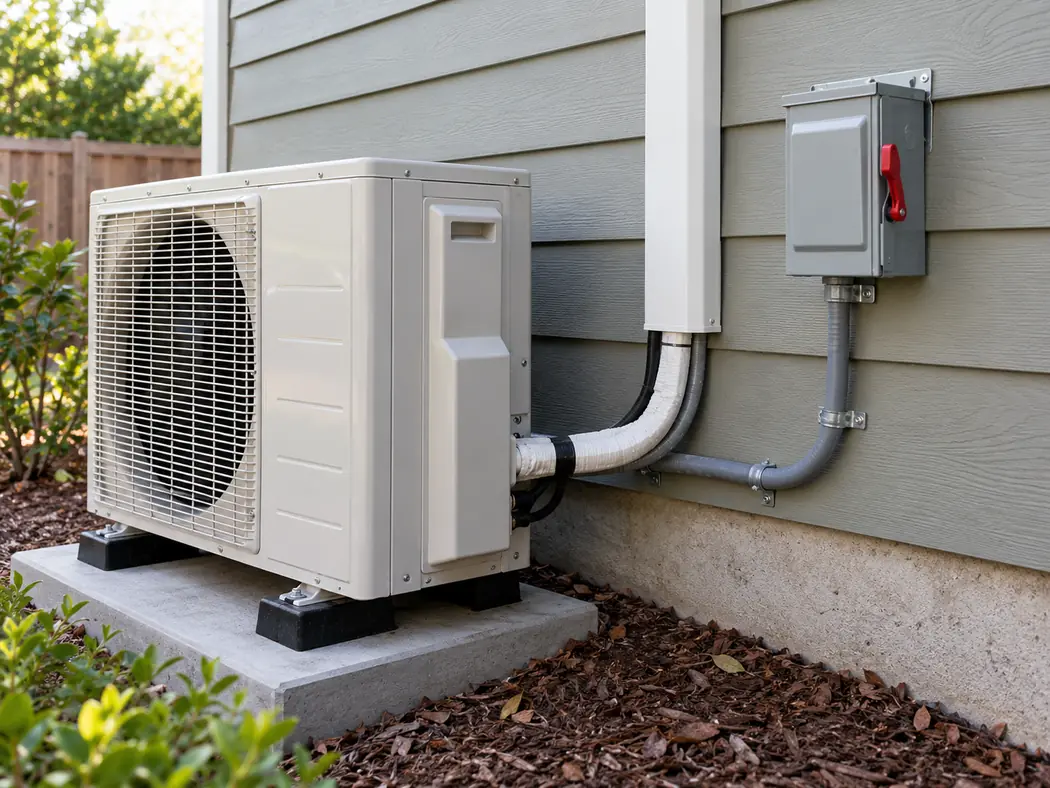
Put the outdoor unit on a level, strong pad or on brackets approved for its weight, vibration and local weather loads. Keep plants, fences and walls from blocking air intake or discharge. Think about nearby windows, noise and room for service. Where snow is common, raise the unit above the expected snow level and keep it away from falling roof ice.
Give cooling condensate and defrost water a safe place to drain. Water that reaches a path or steps can freeze and become slippery. Wall brackets can free up ground space, but vibration may travel into your building. Check the mounting structure and vibration control. Local noise rules, building requirements and property setbacks may rule out some locations.
If nearby bedrooms, neighbors or local noise limits make sound important, compare the selected model’s published figures under like-for-like conditions. Sound power and sound pressure are different measures, and a brochure dB value alone does not prove how loud the unit will be at a window. Distance, reflected sound, mounting vibration and operating mode can change the result, so check the proposed location against the model instructions and applicable local rules.
What Happens During the Physical Installation?
The installer mounts the units, runs the pipes and drain, makes the electrical and refrigerant connections, and carries out the start-up checks. Do not copy tightening torque, leak-test pressure, evacuation (air-and-moisture removal) targets, wire terminals or refrigerant charge amounts from a general web guide. These values must come from the manual for your exact model.
1. Mount the Indoor Unit and Seal the Wall Opening
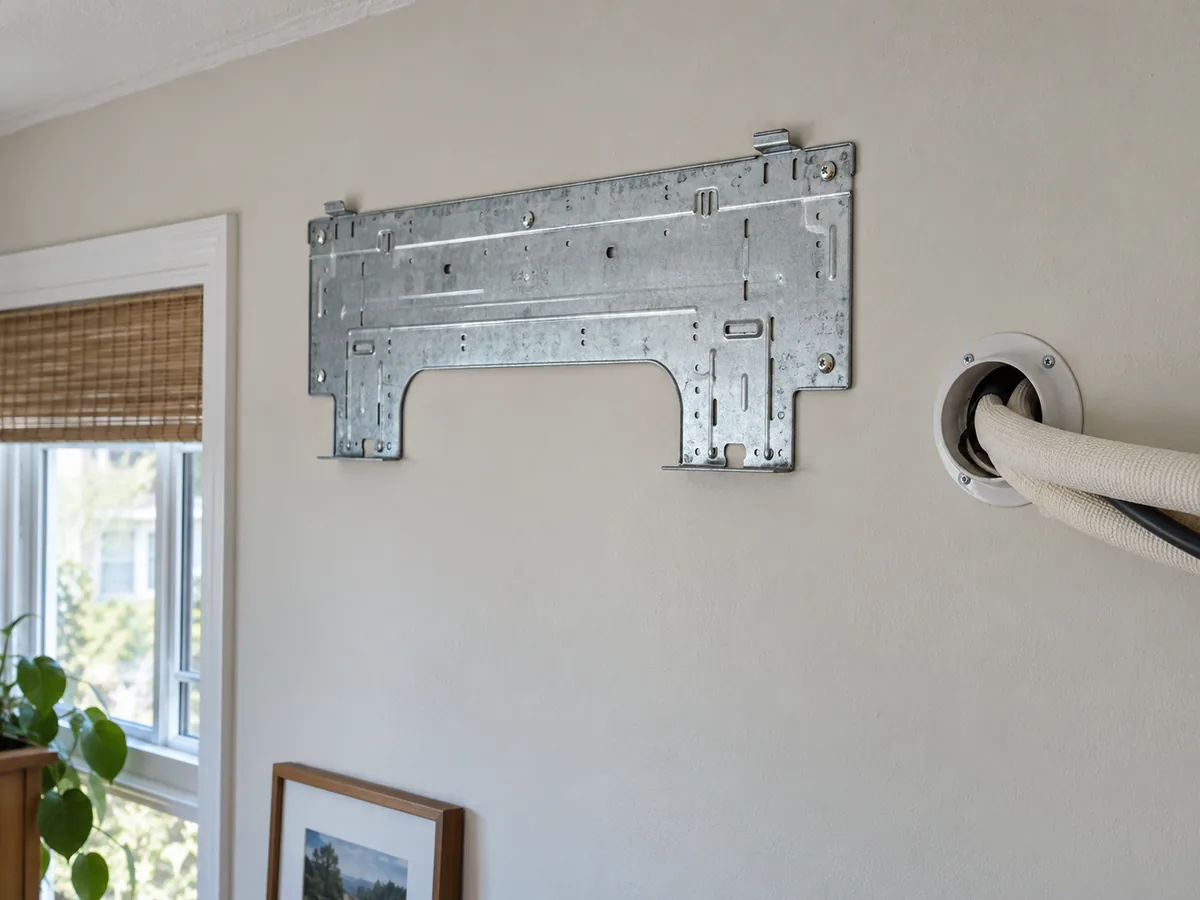
Use the mounting plate or support specified for the indoor unit and make sure it is level and firmly fixed to the wall. Before drilling, check for hidden electrical cables, water pipes, wall framing and any fire-rated or structural barrier. Where the building design and code require it, protect the wall opening with a sleeve and seal it against water and air.
A wall hole that slopes the wrong way or is not sealed can let rain, insects and outside air into the home. Cover or sleeve the pipes where they could rub against the wall. Keep the connections reachable for service, and follow the drilling position and bracket instructions for the exact indoor model.
2. Mount the outdoor unit and plan the drain
Secure the outdoor unit to an approved pad, stand or bracket. Use the anchoring and vibration-control parts required for that equipment and location. Leave a safe path for water to leave the unit during cooling and during winter defrost cycles, where those apply.
The indoor drain normally needs to run downhill all the way to an approved outlet. If gravity drainage is not possible, a compatible condensate pump may be used where the unit and local rules allow it. Keep the pump accessible and install the required pump-failure protection. Test the finished drain with water before closing the wall or pipe cover. A drain that looks level may still hold water and overflow, especially when humid weather produces more condensate. If a pump is required, confirm what happens when it stops or its alarm is triggered; follow the model’s approved protection and shutoff arrangements.
3. Route the refrigerant lines and wiring
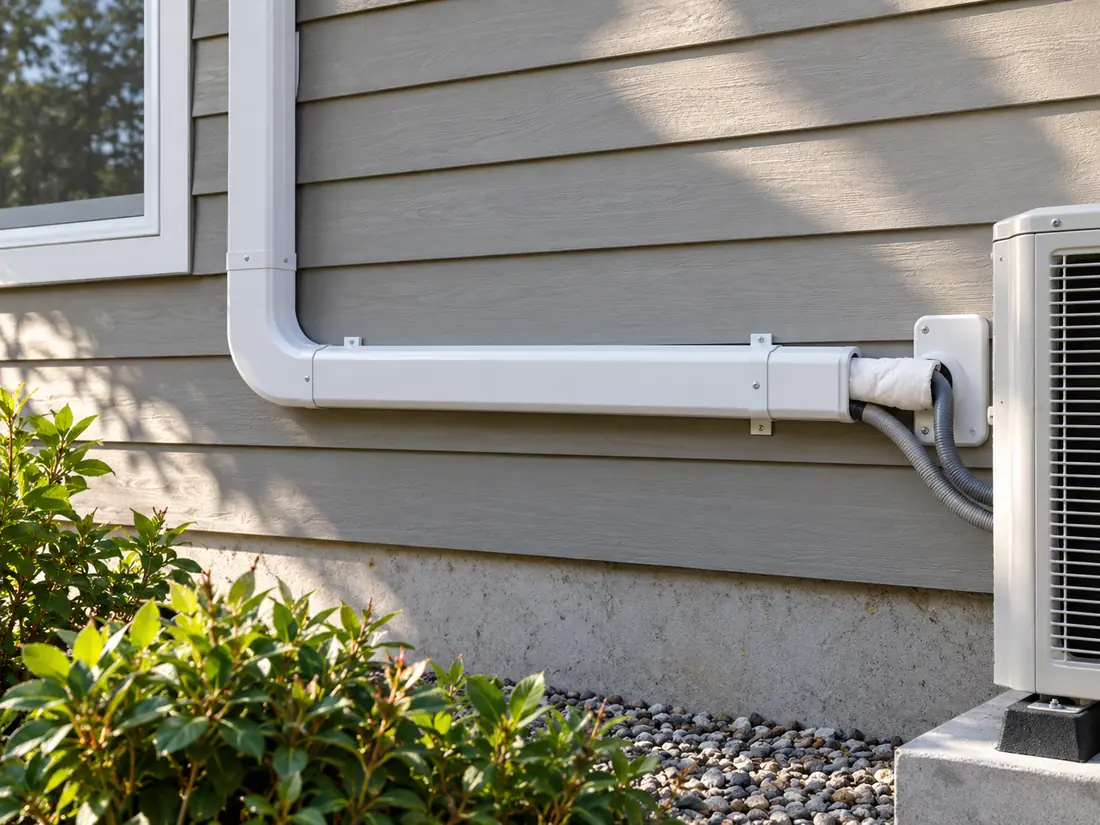
Use refrigerant pipe sizes and insulation approved for the exact model. Check the permitted pipe length and vertical height difference before fixing the indoor and outdoor locations. A longer approved route may require a refrigerant charge adjustment, but extra refrigerant does not make an out-of-limit route acceptable. If the proposed route exceeds the manual’s limits, change the unit locations or the system design before installation. Protect outdoor insulation and covers from sunlight, rain and damage. Keep the drain free from unwanted low spots that trap water, and protect cables as required.
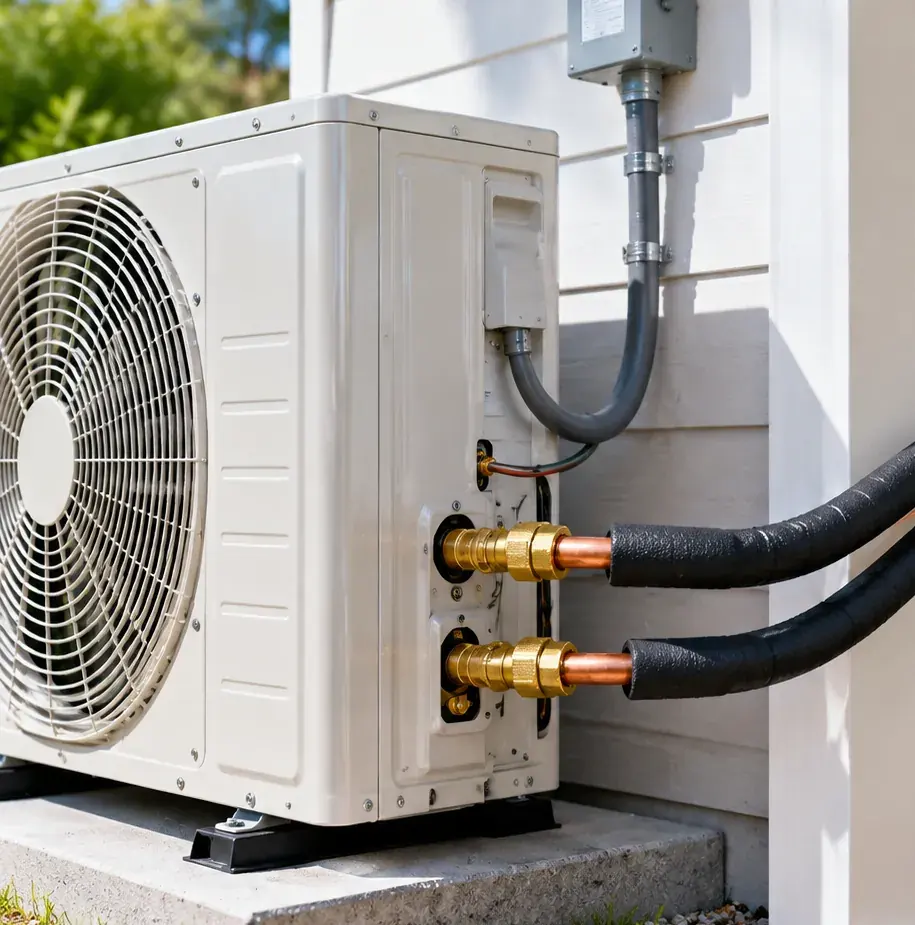
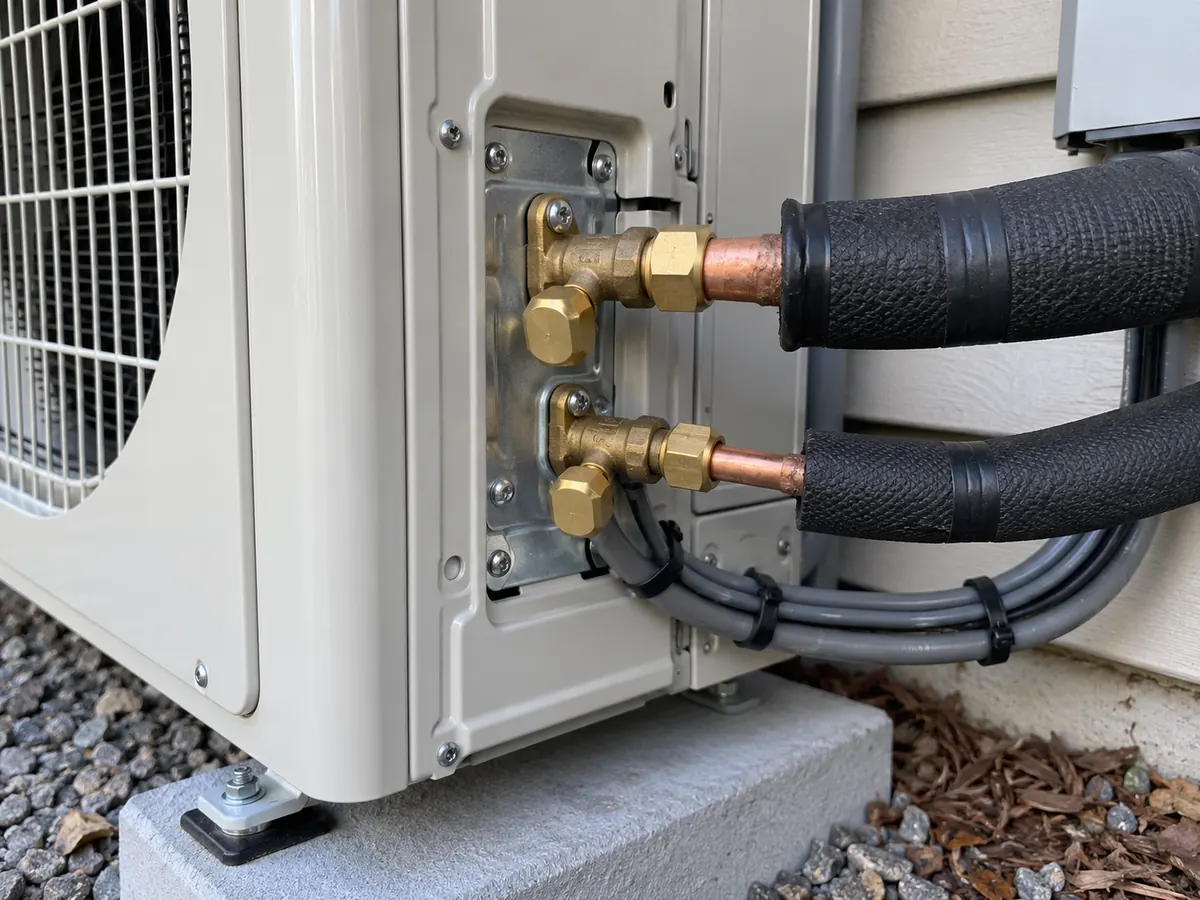
For a conventional mini split, the required qualified or certified workers make the refrigerant connections. They then perform the pressure and leak checks and remove air and moisture from the pipework (evacuation) as required by the model’s instructions. They adjust the refrigerant amount only when the approved procedure calls for it. Leaks, trapped moisture, bent pipes and incorrect charge can reduce heating and cooling performance or damage the system. A factory refrigerant charge does not prove that the installed pipes have passed these checks.
4. Connect electrical supply and controls
Use the electrical ratings on the equipment nameplate, the wiring diagram for the exact model and local electrical code. Have a qualified electrical installer check the supply voltage, circuit, overcurrent protection, disconnect, grounding and required wire size. Confirm whether power enters at the indoor or outdoor unit. Many mini splits use their own communication wiring; do not assume they connect like a conventional 24 V thermostat. If the project also includes electric backup heat or several outdoor units, check the combined electrical demands and the approved control or changeover arrangement before finalizing the installation.
Electrical connections are not a place to guess. The qualified worker must turn off power and verify the circuit is safe before working on it. Using the wrong terminals or copying another system’s thermostat diagram can damage the controls or cause shock or fire. Before power is switched on, the installer must check the wiring and protective devices.
5. Start and Test Heating, Cooling, Drainage and Controls
Only start the mini split after the required refrigerant and electrical checks are complete. Follow the commissioning steps for the exact model and record the operating mode, indoor and outdoor temperatures, the measurements required by the manual and any fault codes. Check airflow and control response in each intended room, plus drainage during cooling when conditions allow. State which modes were actually tested under the weather conditions on site. If deep-winter operation could not be observed, use the matched model’s published capacity data and the design heating load to assess winter suitability; do not record a warm-weather start-up as a field test at the winter design temperature.
Feeling air at the indoor unit does not prove that the system is correctly installed or charged. Ask for the required leak and evacuation records—or the connection checks specified for a factory-sealed system—plus electrical, drainage and control test results. Keep the model’s published winter heating data with the installation records.
Can You Install a Mini Split Heat Pump Yourself?
For a conventional mini split in the United States, you cannot complete every installation step yourself unless you meet the certification and other requirements that apply to the work. You can help measure rooms, plan unit locations and carry out site preparation where local rules and the product warranty allow. Connecting or disconnecting conventional pre-charged refrigerant lines and adding or removing refrigerant require EPA Section 608 technician certification. Check the electrical rules, permits and warranty conditions for the exact system separately.
Before choosing a self-install or partial-DIY route, read the exact kit instructions and warranty terms. Ask the local building department which work needs a permit or licensed tradesperson, and confirm in advance that a qualified installer will complete any regulated work and accept the planned handover. A factory-charged outdoor unit is not proof that its field connections are homeowner-serviceable.
| Installation task | What you may be able to do | What still needs checking |
|---|---|---|
| Measure rooms and suggest unit locations | Share measurements and discuss preferred spots | Final positions must meet load, airflow and clearance requirements |
| Prepare brackets or an outdoor pad | Help only if local rules, site conditions and warranty allow | A suitable person must verify the structure and safe anchoring |
| Prepare drain or pipe covers | Some nonregulated preparation may be allowed | Incorrect drain slope, wall sealing or pipe protection can cause failures |
| Connect conventional refrigerant lines or service ports | Do not do this without the required certification | EPA Section 608 and approved refrigerant procedures apply in the U.S. |
| Install a dedicated circuit and disconnect | Work only where your local electrical rules allow | Incorrect wiring creates shock and fire risks |
| Test the installed system and keep records | Observe the test, learn the controls and keep the documents | Qualified workers perform regulated technical checks and commissioning |
How Much Does Mini Split Heat Pump Installation Cost?
Mini split heat pump installation does not have one fixed U.S. price. The total changes with the number of indoor units, the model’s heating performance, pipe length, mounting work, electrical upgrades and local labor rates. The published U.S. figures below can help you plan a budget. They are not an Airproz quote or a price for your specific project.
| U.S. installation type | Published cost guide | What can change the price |
|---|---|---|
| General mini split project estimate (Angi) | About $2,000–$5,000 (updated April 2026) | Check which equipment, labor and site-work items the estimate covers |
| Installed single-zone mini split (HomeGuide) | About $2,500–$6,000 (published 2025) | Equipment and installation scope may differ by location |
| Installed multi-zone mini split (HomeGuide) | About $6,500–$15,000+ (published 2025) | More indoor units and greater site complexity; compare the actual scope |
These are separate published U.S. consumer cost estimates, not amounts to add together. They use different equipment, labor and site-work assumptions and are not firm local bids or Airproz equipment quotes.
Compare local quotes for the same matched indoor–outdoor equipment, number of indoor heads, rooms and heating needs. Check pipe and drain routes, outdoor supports, wall repairs, electrical work, condensate pumps, line covers, permits, taxes, refrigerant testing, commissioning, warranty coverage and installer service responsibilities. Mark each item as included, excluded or an allowance before comparing totals. A cheaper bid that omits required work is not a like-for-like comparison.
In an older home, long pipe routes combined with electrical upgrades can increase installation work without changing the unit’s nominal capacity. If the mini split will be the main heater in a cold climate, include winter heating design and any backup-heating work in the project scope. Ask for those site-specific items to be priced separately so you can identify the real differences between bids.
How Do You Check the Installation Before Sign-Off?
Before you sign off, check three things: the installed models match the agreed design, the units and drain are safe and accessible, and the required tests are documented. These should cover the refrigerant circuit, electrical protection, drainage, controls and heating or cooling response.
- Correct equipment: The indoor and outdoor model numbers match the approved design and manufacturer-approved combinations.
- Safe installation: Supports, clearances, pipe protection, drainage and electrical protection have been checked against the exact model and local requirements.
- Required technical tests: Qualified workers have completed and recorded the refrigerant, wiring and start-up tests required for the system type.
- Operating checks: Each intended indoor unit responds to its controls, the drain carries water safely and the available heating or cooling modes have been tested under the observed conditions.
- Handover records: Keep the commissioning results, permits and inspection records where required, and instructions for filter cleaning and basic operation.
For each model-required technical check, ask the installer to show which instruction applies, what measurement or observation was recorded, and whether it met that instruction’s acceptance criteria. Keep failed and untested items separate from passed checks, and have failed work corrected and retested before sign-off. If winter design conditions were not present, record cold-weather field performance as unverified under those conditions; retain the published design-point capacity check rather than reporting a mild-day start-up as a passed winter test.
During the handover, ask the installer to demonstrate the controls, show how to access the filters and confirm that condensate reaches the intended drain outlet. Look for unusual vibration, blocked airflow or water near walkways, but do not open electrical panels or refrigerant connections.
| What you notice | What might be wrong | What to check next |
|---|---|---|
| Water dripping under the indoor unit | Drain slopes the wrong way, blockage, sweating uninsulated pipes or failed pump | Test water flow and any pump alarm; fix the cause before finishing the job |
| Weak heating in cold weather | Too little output at the design temperature, poor airflow, defrost issue or system fault | Check the selected mode, setpoint, accessible filters and visible airflow first. If heating remains weak, have the installer compare the outdoor conditions, defrost behavior and fault records with the model’s published heating data. |
| Rattling or strong outdoor vibration | Loose anchors, pipes touching the structure or poor vibration isolation | Check brackets, supports and pipe contact; correct the cause |
| Frequent stopping and starting, or uneven room temperatures | System too large for the load, poor zone match, blocked air or incorrect controls | Check room loads, minimum output, indoor positions and settings |
| Refrigerant or electrical fault code | Refrigerant leak or charge problem, wiring issue, sensor or control fault | Follow the model fault instructions; qualified workers check refrigerant and electrical parts |
Frequently Asked Questions
How long does mini split installation take?
There is no fixed installation time for every mini split. A straightforward single-zone project may need less site work than a multi-zone retrofit, but drilling, long pipe routes, electrical upgrades and inspections can add visits. Ask the installer to identify when mounting, refrigerant and electrical work, start-up checks and any inspections will happen. Confirm whether heating and cooling can both be tested during that visit or whether another check will be needed.
Do mini splits need a dedicated electrical circuit?
Many mini splits need a dedicated electrical circuit, but you must check the exact model. The equipment label (nameplate) and installation manual show the required supply and protection. Have the qualified electrical installer confirm the circuit, disconnect switch and breaker or other protective device. A BTU rating does not tell you the correct wire or breaker size.
Can a mini split heat an entire house?
Yes, a properly designed mini split system can heat an entire home. You need a heating-load calculation for each room and enough heating output at the local winter design temperature. The warm air must also reach the rooms that need it. One wall-mounted head may not adequately heat bedrooms behind closed doors. Multi-zone systems still have limits on combined output and operating modes.
Does a ductless mini split provide fresh air?
Usually not. Most standard wall-mounted ductless mini splits move and heat or cool air already inside the room. They do not automatically bring in outdoor air. Your home may still need a separate fresh-air ventilation plan and suitable humidity control.
What Should You Check Before Your Mini Split Installation Is Complete?
Before accepting a mini split installation, confirm that each room’s load was checked and the installed indoor–outdoor models match the approved design. Verify safe placement, drainage, electrical and refrigerant work, and required permits. For primary heating in a cold climate, check published output at the winter design temperature rather than assuming a mild-day test proves cold-weather capacity. Compare quotes for the same equipment and work scope. Keep the model-required test and inspection records; arrange correction or follow-up for any failed or untested requirement before sign-off.
Sources
- U.S. DOE Building America, Ductless (Mini-Split) Heat Pumps — design, installation and commissioning scope
- ENERGY STAR, Ductless Heating & Cooling — proper sizing and cold-climate considerations
- U.S. EPA, Section 608 Technician Questions and Answers — conventional mini split refrigerant work
- U.S. EPA, Technology Transitions HFC Restrictions by Sector — 2026 residential/light-commercial split-system refrigerant eligibility and pre-2025 component exception
- Angi, How Much Does It Cost to Install a Mini-Split? (updated April 4, 2026) — source for the general U.S. project estimate.
- HomeGuide, How Much Does a Mini Split Installation Cost? (published October 8, 2025) — source for the installed single-zone and multi-zone ranges. Both are consumer estimates; neither is an Airproz quotation.
Need Product Information for a Mini Split Project?
If you are considering an Airproz product, you can share the intended market, room loads and proposed system layout when asking for product information. Check the exact model documents for compatibility, regulatory eligibility and availability. Arrange local installation, permits and commissioning with qualified providers; these services are not implied by this article.